Peer checking is a technique where two individuals work together to prevent errors before and during a specific action or task. Here are the key points about peer checking:
It involves a performer (the person doing the task) and a peer checker (someone familiar with the task who observes the performer).
The purpose is to prevent errors by the performer by having a second set of eyes verify the correct action is being taken.
The performer and peer checker first agree on the intended action and component. Then, the performer performs the action while the peer observes to confirm it was done correctly.
It augments self-checking by the performer but does not replace self-checking. Both individuals self-check in parallel.
The peer checker provides a fresh perspective that is not trapped in the performer’s task mindset, allowing them to potentially identify hazards or consequences the performer may miss.
It is recommended for critical, irreversible steps or error-likely situations where an extra verification can prevent mistakes.
Peer checking should be used judiciously and not mandated for all actions, as overuse can make it become a mechanical process that loses effectiveness.
It can also be used to evaluate potential fatigue or stress in a co-worker before starting a task.
Personally, I think we overcheck, and the whole process loses effectiveness. A big part of automation and computerized systems like an MES is removing the need for peer checking. But frankly, I’m pretty sure it will never go away.
Task decomposition is a systematic approach to breaking down a complex task into smaller, more manageable components. A more detailed version of task analysis helps organize work, improve understanding, and facilitate effective execution.
Step 1: Understand the Task
The first step in task decomposition is to fully understand the task at hand. This involves defining the main objective, identifying the final deliverables, and recognizing all the requirements and constraints associated with the task.
Step 2: Break Down the Task
Once the task is clearly understood, the next step is to break it down into smaller, more manageable parts. This can be done by identifying the major components or phases of the task and then further dividing these into subtasks.
Techniques for Breaking Down Tasks:
Hierarchical Task Analysis (HTA): This involves creating a hierarchy of tasks, starting with the main task at the top and breaking it down into subtasks and further into individual actions.
Functional Decomposition: Focus on dividing the task based on different functions or processes involved.
Object-Oriented Decomposition: Used primarily in software development, where tasks are divided based on the objects or data involved.
Step 3: Sequence the Tasks
Determine the logical order in which the subtasks should be completed. This involves identifying dependencies between tasks, where some tasks must precede others.
Step 4: Assign Resources and Estimate Time
Assign the appropriate resources to each subtask, including personnel, tools, and materials. Additionally, estimate the time required to complete each subtask. This helps in scheduling and resource allocation.
Step 5: Prioritize Tasks
Not all tasks are equally important. Prioritize tasks based on their impact on the overall project, their urgency, and their dependencies.
Step 6: Monitor and Adjust
Once the decomposition and planning are in place, the execution phase begins. It’s important to monitor the progress of tasks, check adherence to timelines, and make adjustments as necessary. This might involve re-prioritizing tasks or re-allocating resources to address any bottlenecks or delays.
Step 7: Documentation and Feedback
Document the entire process and gather feedback. This documentation will serve as a valuable reference for future projects, and feedback can help in refining the decomposition process.
Task decomposition is a dynamic process that may require iterative adjustments. Used well, it is a powerful tool in the quality toolbox.
It never ceases to amaze me how many ways an eQMS can subdivide a task. CAPA actions, change actions, meeting actions, supplier actions, etc, etc, etc. It is dizzying.
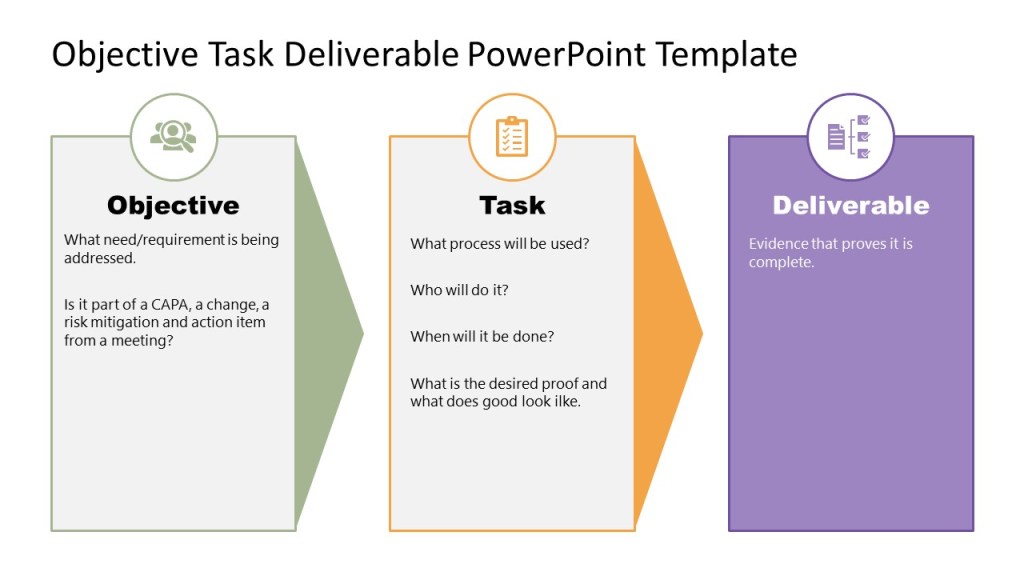
Tasks are all the same. They comprise of an objective, which is they why. A task (the who, when, what) and a deliverable (proof it is done)
I can count some off the shelf eQMS platforms that have 6+ workflows for this. Absolutely no need. It just makes the end user confused.
Just a little rant brought to by my favorite activity, implementing and improving eQMS functionality.
A RACI chart is a simple matrix used to assign roles and responsibilities for each task, milestone, or decision. By clearly mapping out which roles are involved in each task and at which level, you can eliminate confusion and answer the age-old question, “Who’s doing what?”
RACI is a useful complement to a process map, since it can get into more detailed and specific activities than a high-level process map. Think of a process map at one level of abstraction and RACI as the next level of detail
What does RACI stand for?
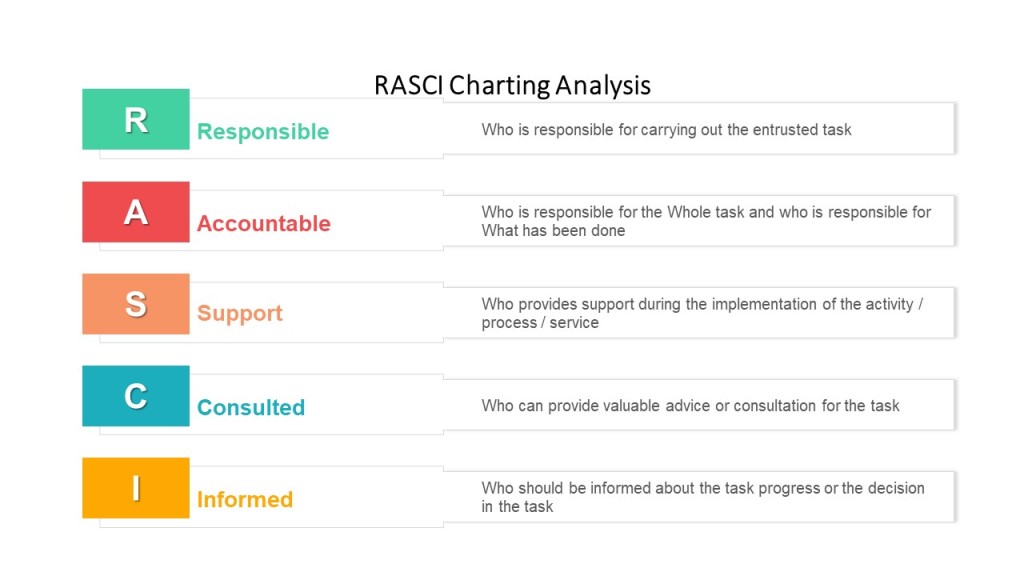
RACI stands for Responsible, Accountable, Consulted, Informed. Each letter in the acronym represents a level of task responsibility.
When to use RACI
RACI’s are best used in procedures as part of the responsibilities section or to start each section in a long procedure.
RACI’s are great tools that can help:
Design or re-design processes more efficiently by highlighting decisions
Clarify overlapping, redundant, “bottle-necked,” or inconsistent responsibilities
Structure and distribute responsibility and authority
Reduce duplication of efforts; pinpoint what can “come off the plate”
RACI definitions
A RACI is a matrix of tasks or deliverables and the roles associated with them.
Each box in the matrix identifies that role’s function in the task
Responsible – primary role performing the work
Accountable – role primarily responsible for the work getting done (and done correctly)
Consulted – roles providing input into the task or deliverable. Consulted means prior to the decision/activity.
Informed – roles to be informed of the outcome of the task or deliverable so that they may fulfill execute their role in the process or other process.
I’m a big fan of adding Supporting, and doing a RASCI. Supporting is very helpful in identifying individuals who provide support services, and often capture indirect accountabilities.
RASCI Chart
Key point – only one Responsible and one Accountable role for any task or deliverable. In some processes, Responsible and Accountable may be the same role
How to create a RACI
Follow these 3 steps, using the RACI chart example below as your guide:
Enter all responsibilities in the procedure across the top row.
List all procedural steps/tasks, milestones, and decisions down the left column.
For each step, assign a responsibility value to each role or person on the team.
Ensure the following:
Every task has one Responsible person (and only one!).
There’s one (and only one!) Accountable party assigned to each task to allow for clear decision-making.
If you have a lot of C and I roles on your matrix, make sure you have an easy and lightweight way to keep them informed in the procedure.
Some points to consider:
Have a representative from each of the major functions that participate in the process
Reach consensus on all Accountabilities and Responsibilities
Consider the emotional aspects of documenting “A”s and “R”s, including job justification
Eliminate excessive “C”s and “I”s
Consider the organization’s culture
Review the RACI chart vertically to:
Avoid under- or over-committing positions or team members
Eliminate unnecessary gates and bottlenecks
Designate appropriate skill sets
Review the RACI chart horizontally to:
Clarify any ambiguous division of labor
Ensure adequate continuity across decisions and process steps
Ensure accountability and authority to get the job done
Although the RACI is a simple tool, the process of creating it and having it agreed is a political process.
Developing RACI charts surfaces many organizational issues because it confronts the three elements of roles and responsibilities:
Role Conception: what people think their jobs are and how they have been trained to perform them
Role Expectation: what others in the organization think another person’s job is and how it should be carried out
Role Behavior: what people actually do in carrying out their job
Example
Deviation Creator
Area Responsible
QA
Investigation Team
Site Head
Take real-time action to minimize and contain the effect of an event
The flow chart is a simple, but important, graphic organizer. Placing the states or steps of an event or process into the correct sequence allows you to reach conclusions and make predictions.
However, its simplicity means we don’t always work to be consistent and can benefit from a little effort to ensure users are aligned.
I am a huge fan of including flow charts in all process and procedure documents.
Steps for Building a flow chart
Capture
Capture the events or steps of the process. Resist the urge to arrange them sequentially and concentrate on capturing the events/steps only.
Cull
If there are more than eight steps in a flow chart we start creating cognitive overload. If a process or procedure has more than eight steps you need to:
Ensure the steps are at the right level, sometimes we have substeps represented and we can cull that. Ensure they are all on the same level of process/procedure/task.
Decide we need to break the procedure into multiple documents. This is a great way to decide what work instructions are necessary.
Look for opportunity for process improvement.
Sequence the events and draw the flow chart
The focus now shifts to temporal relations. The correct sequential arrangements of steps or events helps to reach conclusions about past events and prepare for future events.
Example
I’m writing the procedure for my mornings, I capture the following:
Eat breakfast
Take shower
Take dog out
Get dressed
Decide on tea
Heat water
Drink tea
Read for 30 minutes
Deal with morning email
Snuggle with dog
Taking a look at the list I realize that not everything is on the same level of process/procedure/task and end up with a shorter list.
Breakfast
Take shower
Take dog out
Get dressed
Read for 30 minutes
Deal with morning email
Snuggle with dog
Notice how I combined all the tea stuff into a breakfast category. When brainstorming my list I put a lot of weight on tea, because it is important to me (yes I have been using tea as a training example since 2005, I just love tea).
I can then put them in sequence:
Flow Chart for my morning
When I was making things sequential I realized that two of my activities (read and dog snuggle) were concurrent, so I combined them as one step.